Put Things Together
If you went though all the activities you played with each command in isolation.
It's now time to go through the entire process in a single step and see how you could leverage each tool together to build a meaningful and clean delivery.
Interactive rebase in IDE
VS Code
Out of the box, VS Code do not propose a dedicated UI for interactive rebase.
You may want to use the Git Lens extension to have a specific rebase editor in VS Code. But there's a catch: you still need to go through the terminal to initiate the process.
Setup
First you need to configure VS Code as your editor for Git:
Temporary, using shell environment variable, this will only apply for current shell session:
export GIT_EDITOR="code --wait"You can also change the Git configuration directly:
git config --global core.editor "code --wait"Or you can only use VS Code for the interactive rebase:
git config --global sequence.editor "code --wait"Interactive rebase Workflow
Process is quite simple:
- First identify the commit where the rebase will start, and copy the SHA.
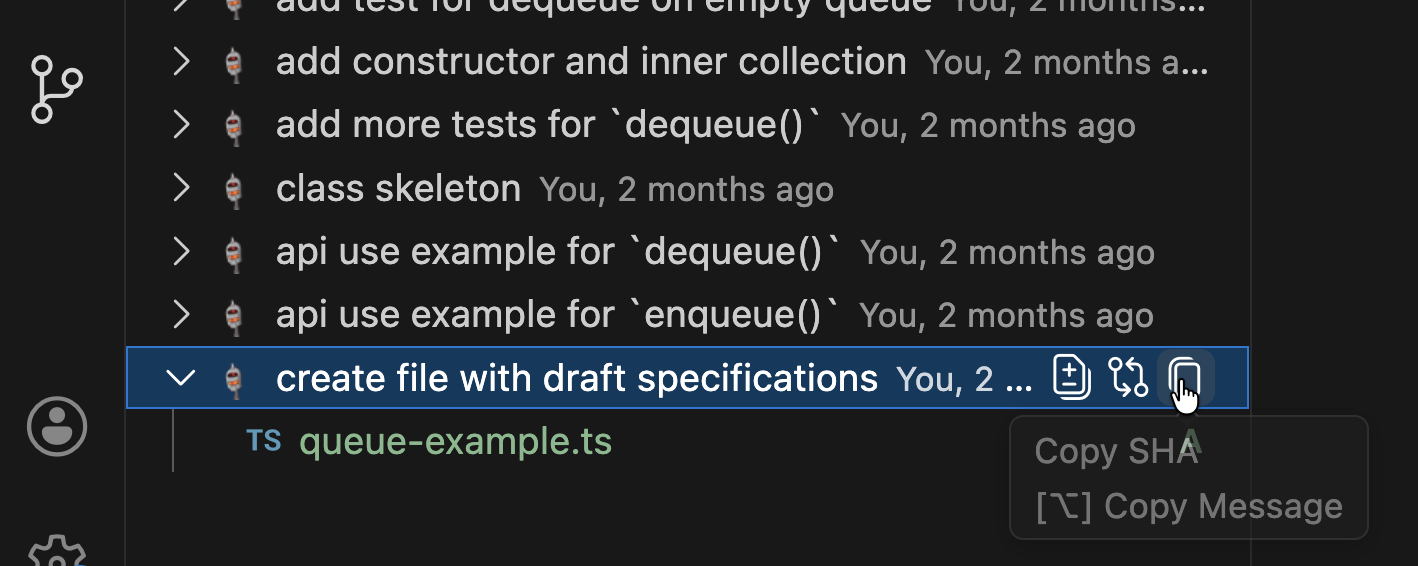
- From a shell terminal, start the rebase. Replace
SHAwith the value you copied:
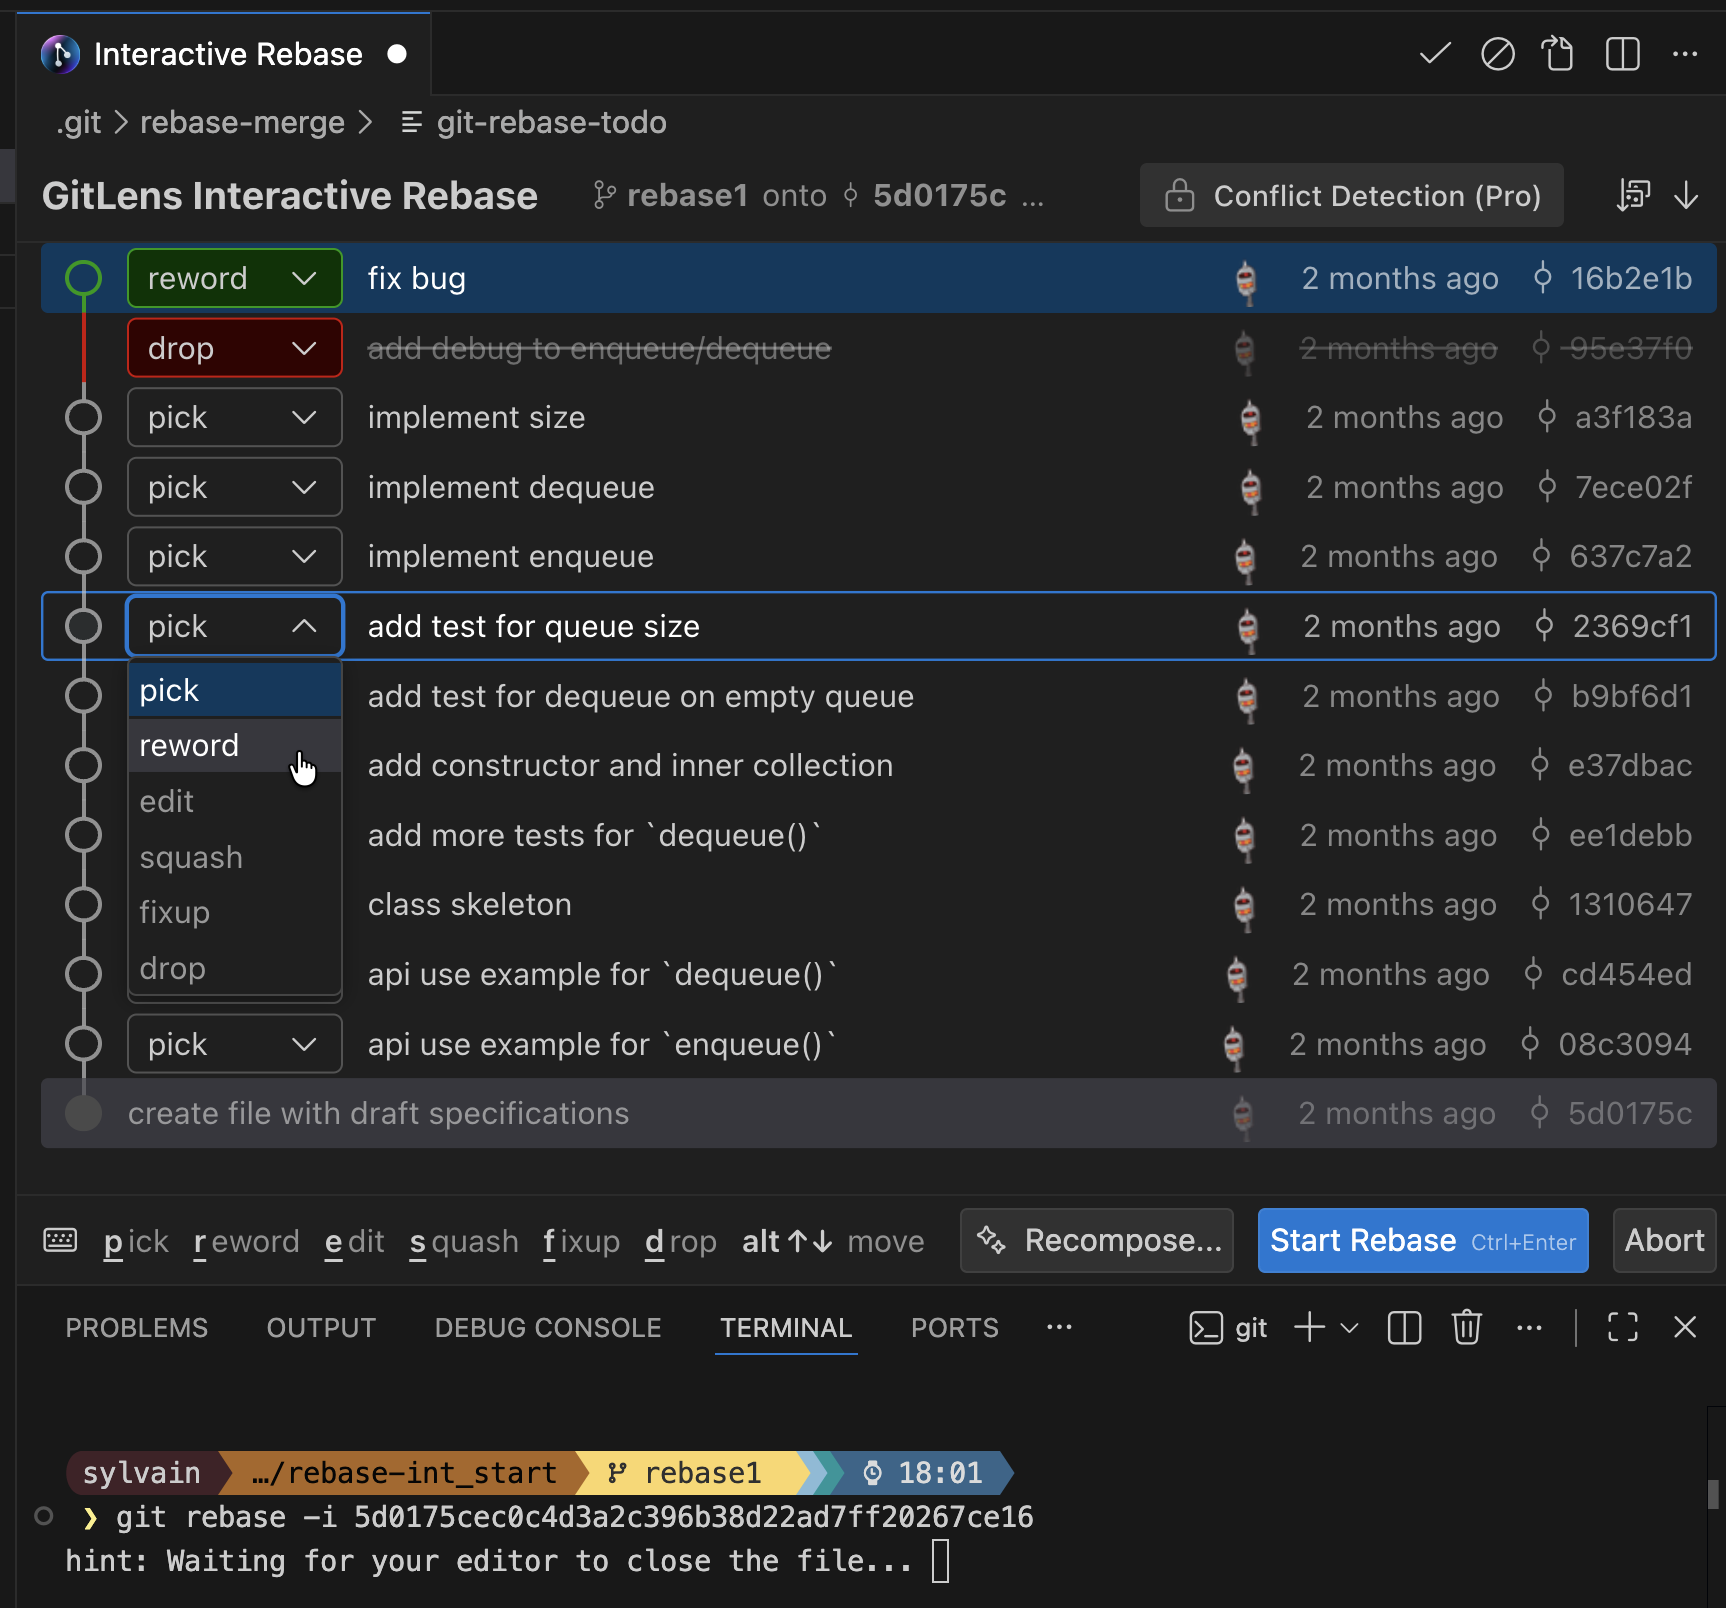
git rebase -i SHA- Rebase will start and Git Lens editor will open:
IDEA IntelliJ
IDEA has full native support for interactive rebase.
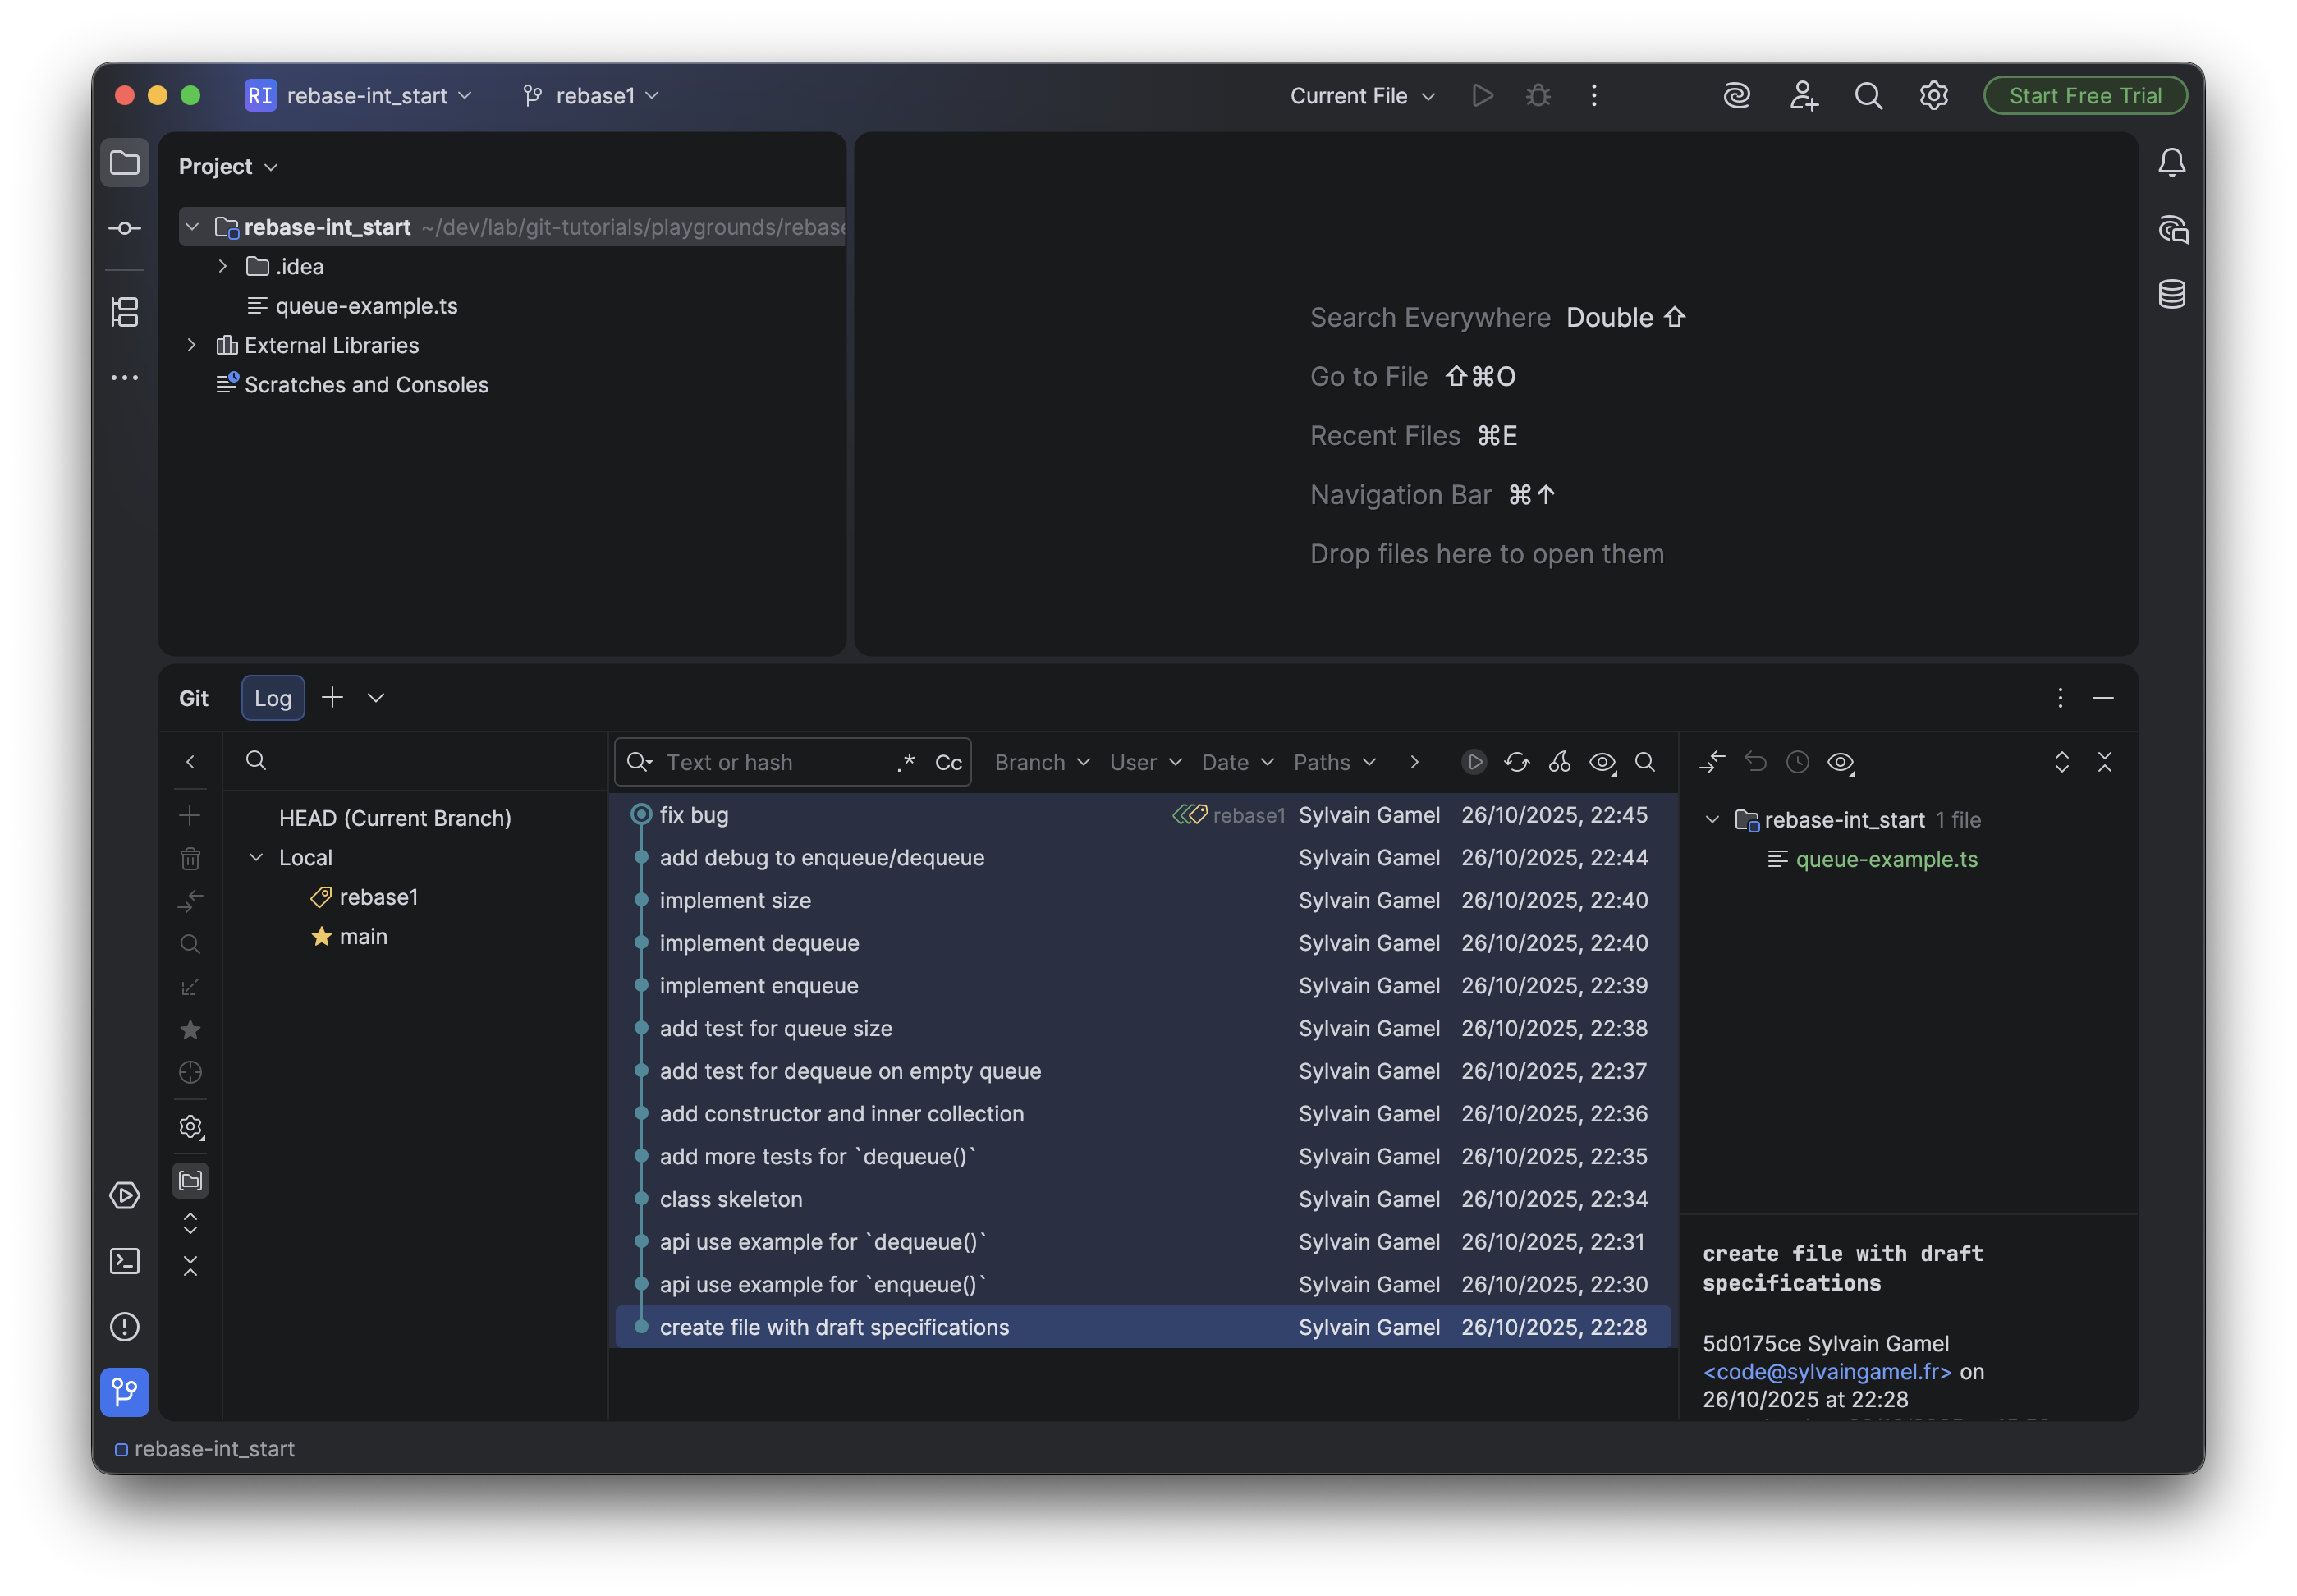
- You just need to open the git history log:
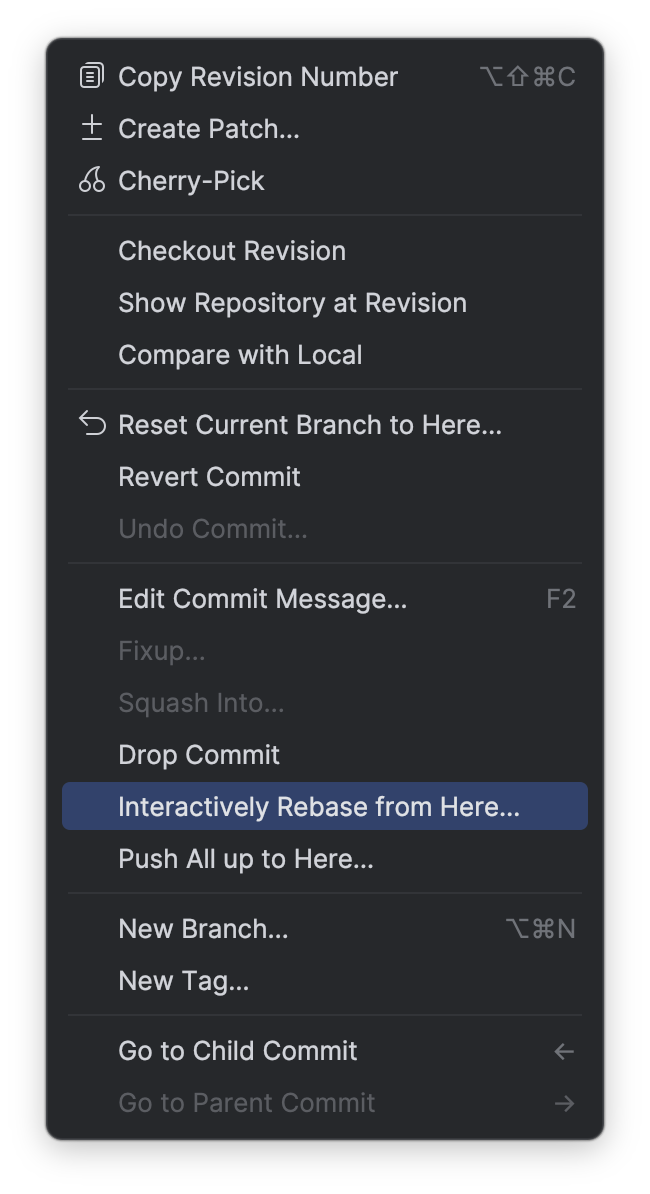
- Open contextual menu on a commit to start an interactive rebase:
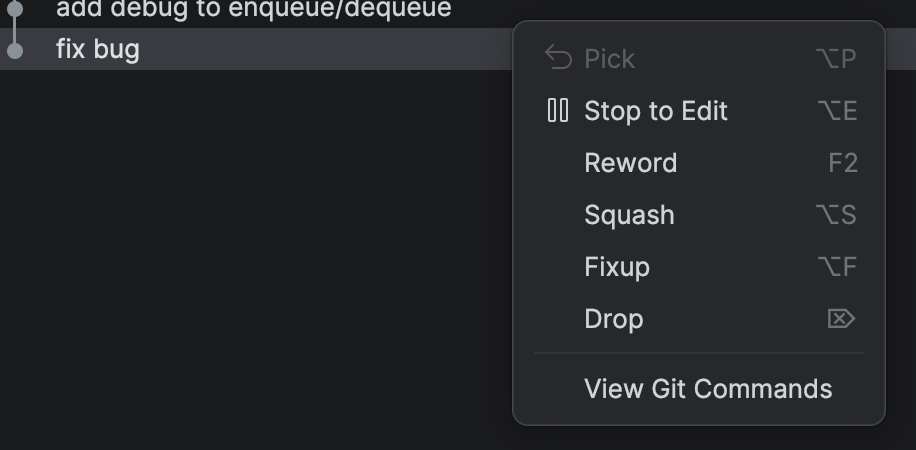
- The editor for the rebase opens.
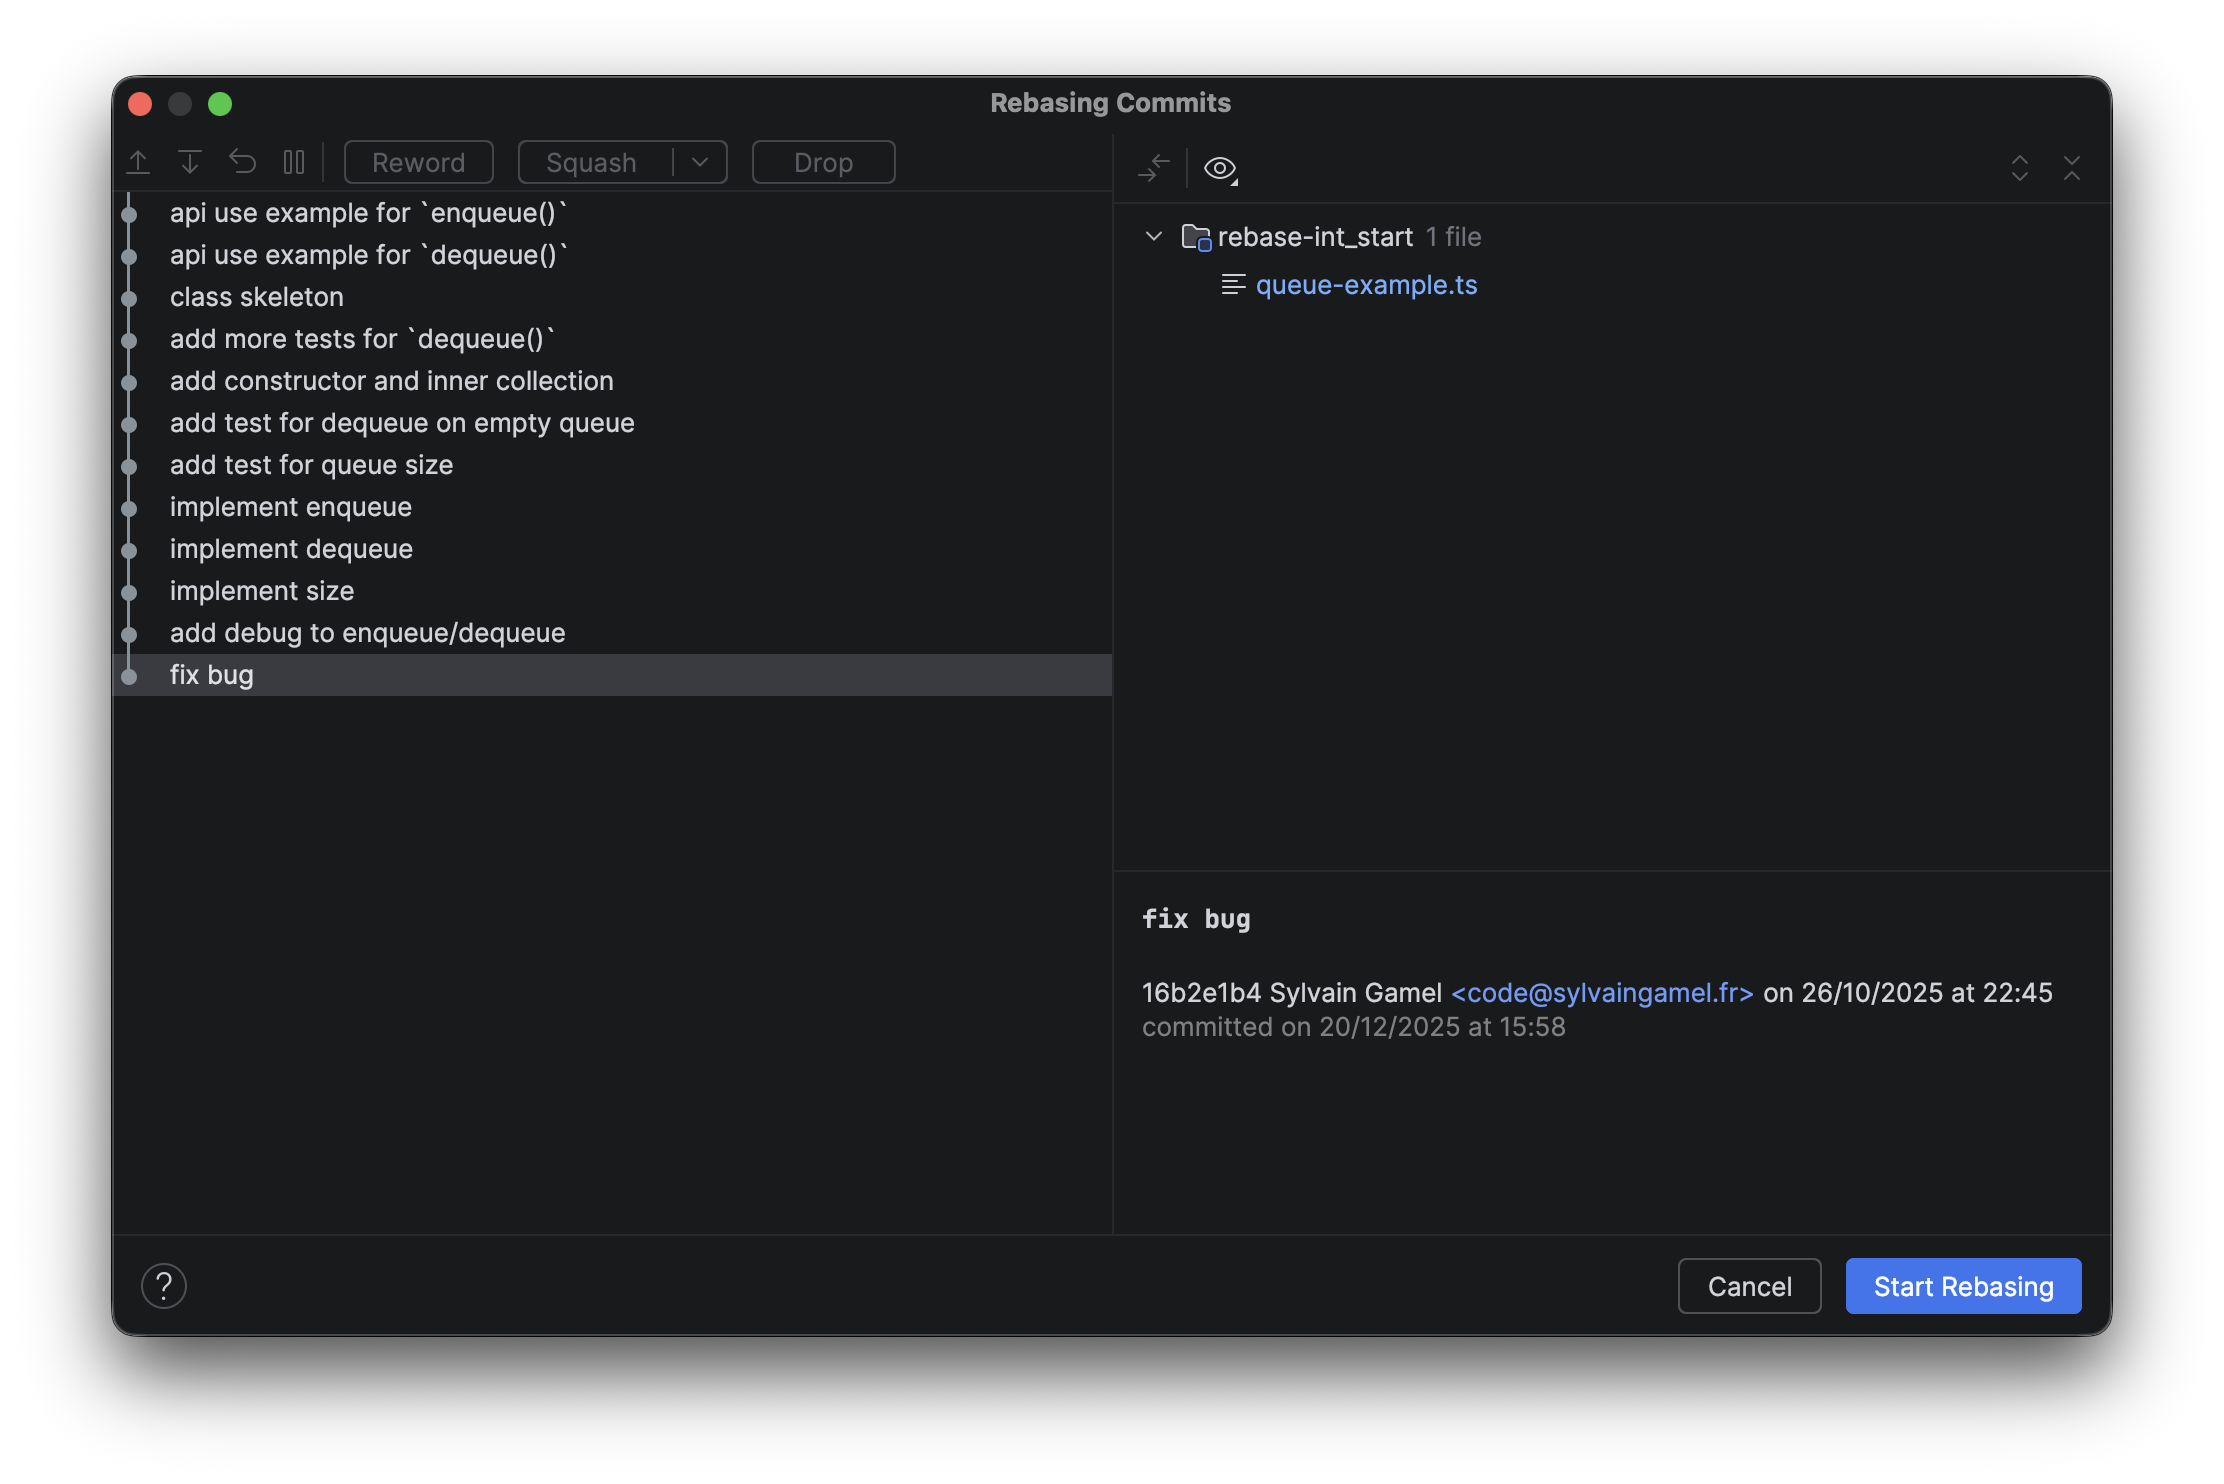
- Each commit has contextual menu for specific actions:
Lazygit
This terminal based UI also implement support for interactive rebase from the commit panel.
- r allow to reword a commit message;
- s short will squash a commit, while f will fixup;
- d is the command to drop a commit;
- e is the edit command to start an interactive rebase.
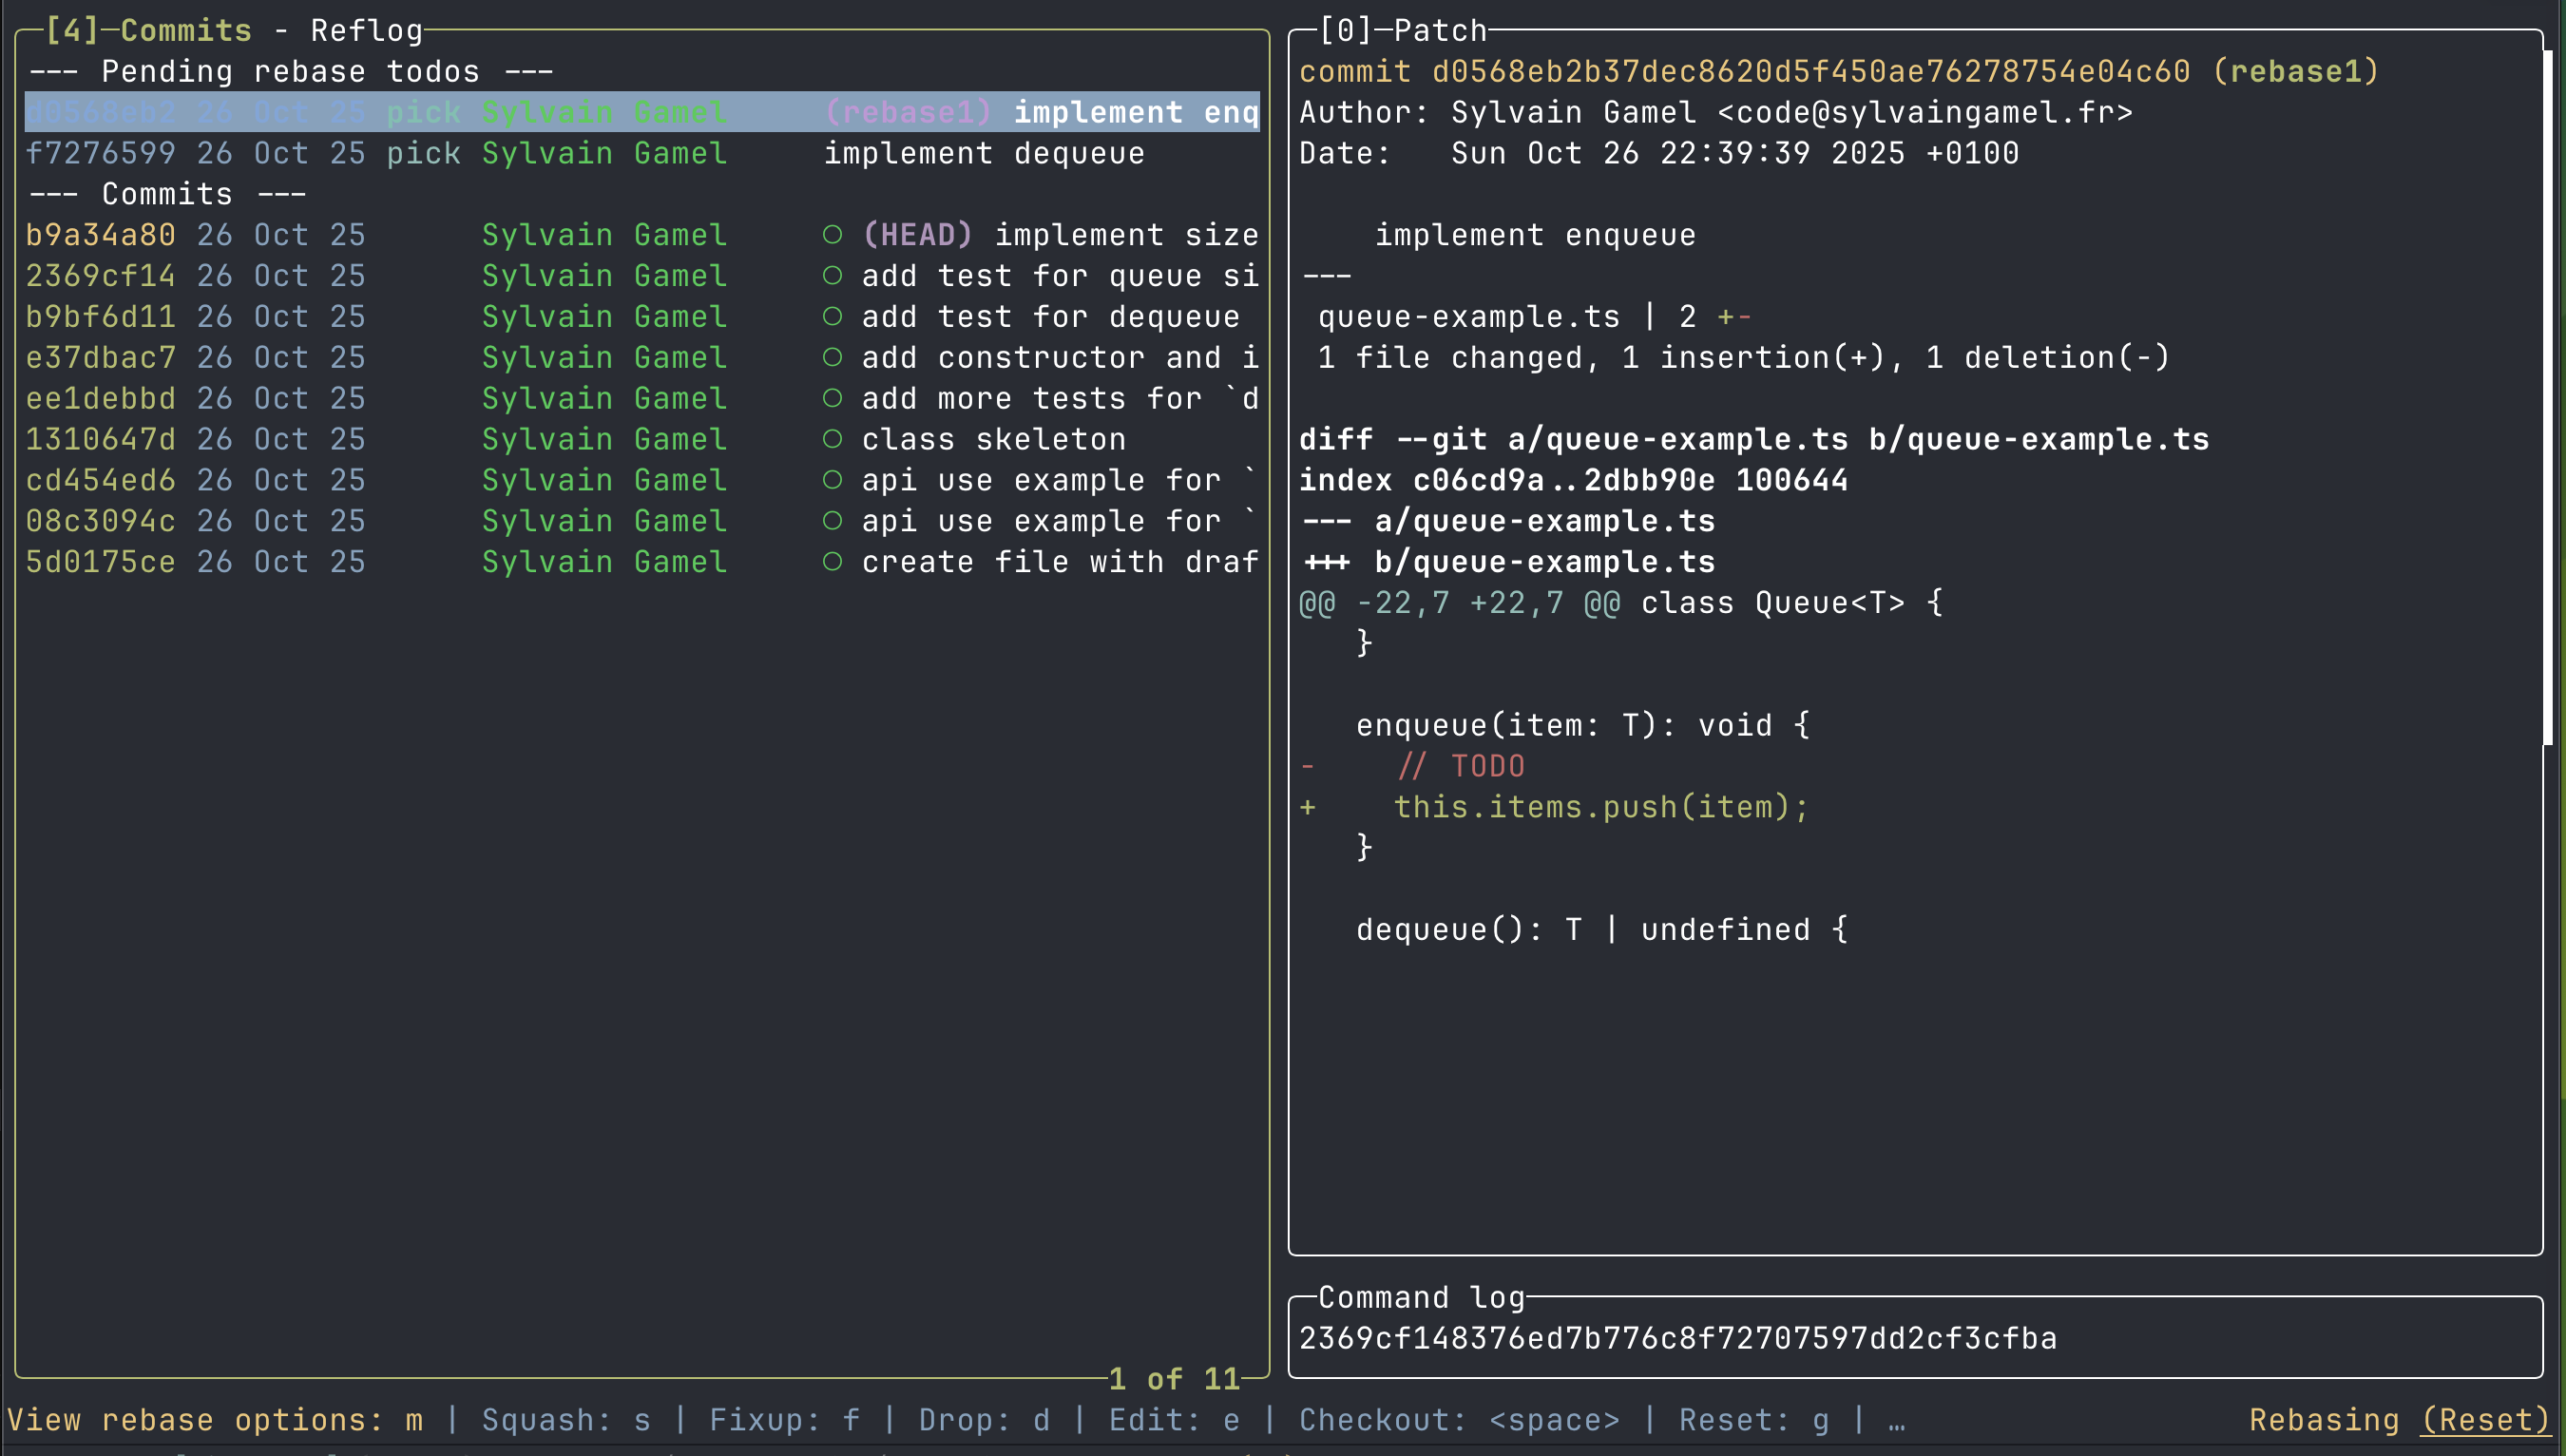
In edit mode you can change commit order:
- control+j to move a commit down;
- control+k to move a commit up;
- and the same shortcuts for other commands.
Please check Lazygit inline help for details with ? shortcut (available in all contexts).
Best practices
Following good practices when using Git is key part of your ability to use interactive rebase:
- commit often
- commit small changes.
- enforce yourself to commit only a stable state
TIP
If you ever need to do a commit of an unstable state, ensure to flag it properly in the commit message.
For example: "feat: implement unit test for future API [do-not-build]"
In your local clone this give you the advantage to build a stable history where you can rely on each commit to be a usable reference or fallback state.
Daily use, from novice to master
You can start using interactive rebase without mastering all the possible commands and actions.
Here are some example use cases for interactive rebase in your daily workflow.
Reordering is key enabler
As long as you don't overlap changes in commits, it should be easy to reorder them.
This is a required step if you need to merge commits that are not next to the others in your history.
From many to single commit
Whether you decide to just blend multiple commits as one with squash or fixup, you will probably use one or the other quite often.
Example: address pull request comments
Given you delivered some code, when you have comments to change your code; then:
- you can do a small commit for each feedback: fix a typo, renaming a variable, split a method
- reorder commits to move each change next to relavant previous commit
- squash or fixup to blent them
Cleanup before delivery
It's quite common to add debug logs in your code during development. Before pushing the code, you will want to remove those useless lines of code.
This is the perfect scenario to use drop command, as long as the debug code were added in their own commits.
Editing commit messages
Your project might require specific pattern in commit message. It's not uncommon to reference a ticket.
In case one of your commit message don't respect this rules, then you can use reword to edit this message.